Review Information
- Reviewed by: Jack Beurge
- Review type: Research-based review
- Testing status: Not personally tested by SAWOFF — based on manufacturer documentation and reputable external sources
- Published: April 28, 2026
Information in this review is labeled as one of four types: 🧪 SAWOFF hands-on test, 🏭 manufacturer specification, 📚 research from reputable sources, or 🧠 editorial assessment. See our testing methodology and editorial policy.
Introduction
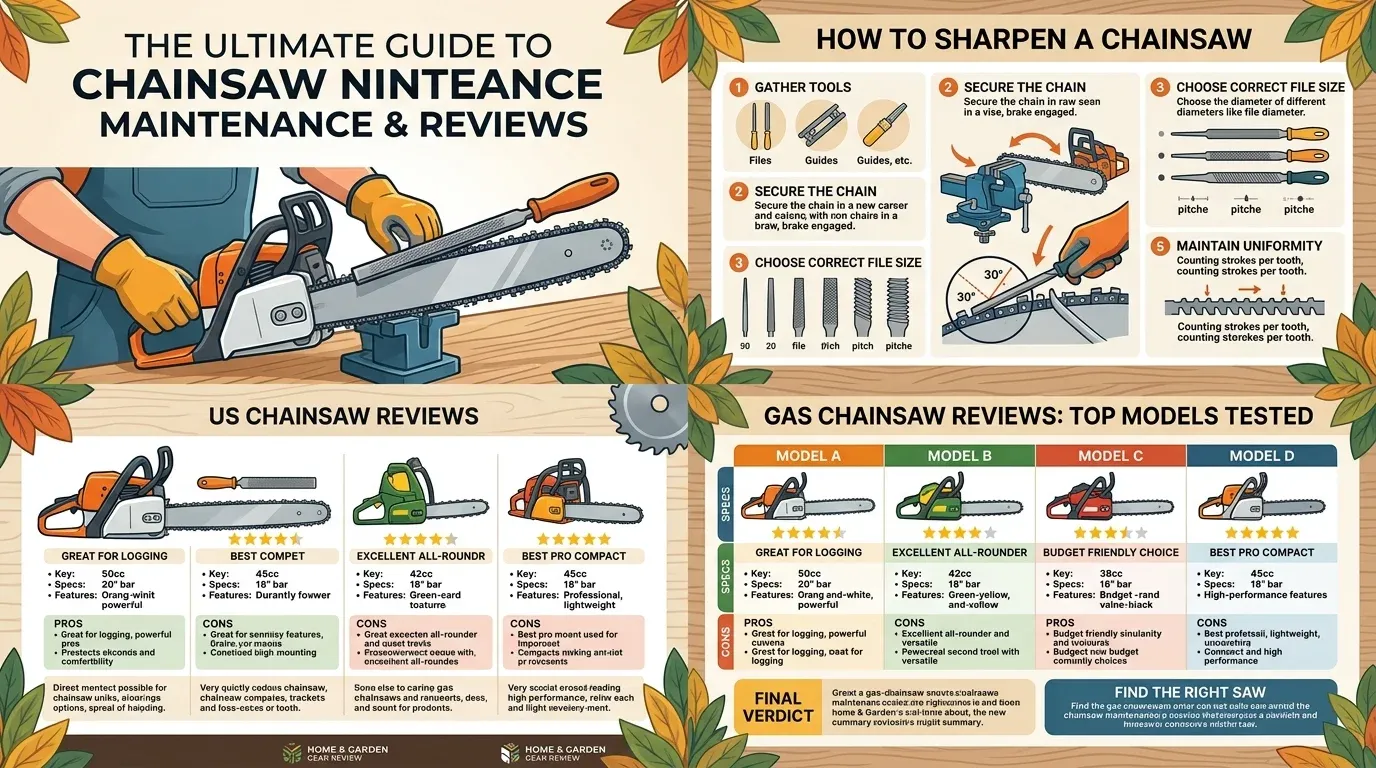
If you’ve spent any real time behind the handlebars of a high-torque beast like the Stihl MS 881, you know the exact moment the honeymoon ends. It’s not when the fuel runs dry, and it’s not when your forearms start to turn into overcooked noodles. It’s the moment your chips turn to dust.
Guys still try to “muscle” a dull saw through frozen white oak. It’s a fool’s errand. A dull chain doesn’t just slow you down; it destroys your bar, overheats your powerhead, and spikes the vibration levels until your hands feel like they’re buzzing three hours after you’ve killed the engine. In this guide, we aren’t just talking about “running a file over the teeth.” We are diving into the metallurgical reality of cutter teeth, the physics of “hook” angles, and the pro-grade engineering required to keep a saw performing at its theoretical maximum.
Quick Answer: How Often Should You Sharpen a Chainsaw Chain?
Sharpen your chain every time you refuel — or as soon as the saw starts producing fine “flour” dust instead of wood chips. That usually means a few strokes of a round file every 2–3 tanks of gas during heavy cutting. Check depth gauges (raker height) roughly every 3rd or 4th sharpening with a dedicated gauge. A sharp chain is a fast, safe chain; a dull one destroys bars, overheats engines, and spikes vibration.
Whether you’re maintaining a Stihl professional model or a prosumer unit like the Toro 60V Max, the physics of the cut remains the same. You need a razor edge, the correct depth gauge clearance, and a perfect geometric match between your file and the tooth’s gullet.
Sharpening Systems: Strategic Comparison
Before we tear into the guts of the process, let’s look at the primary ways you’re going to achieve this edge. Not all sharpening methods are created equal.
| Sharpening Method | Portability | Precision | Best For | Gear Recommendation |
|---|---|---|---|---|
| Manual Round File | High | High (with skill) | Field touch-ups & daily use | File Guide Kit |
| Electric Bench Grinder | Low | Ultimate | Shop-based restoration | Oregon 511AX |
| 2-in-1 Easy Filers | Medium | High | Homeowners & Prosumers | Pferd CS-X |
| Battery Grinders | Medium | Moderate | Emergency field repairs | Stihl 12V Grinder |
Technical Engineering Deep-Dive: The Anatomy of a Cutter
To understand sharpening, you have to understand the tooth. A modern chainsaw chain is a marvel of metallurgical engineering. Most high-end chains use a chrome-plated carbon steel. The chrome isn’t just for looks; it provides the “industrial diamond” hardness required to survive the abrasive nature of bark and grit.
1. The Top Plate and the Side Plate
The tooth is comprised of two critical cutting edges: the top plate (the horizontal edge) and the side plate (the vertical edge). When these two meet, they form the “working corner.” This corner is the tip of the spear. If the working corner is rounded, the saw won’t “self-feed.”
In my experience, 90% of beginners focus too much on the top plate and ignore the side plate. If you don’t have a clean, vertical hook on that side plate, you’re essentially trying to cut wood with a butter knife. The angle here’typically 25 to 35 degrees depending on the wood density’determines how aggressively the saw bites.
2. The Gullet and Chip Clearance
The area beneath the cutting edge is the “gullet.” As the tooth shears a fiber of wood, that chip has to go somewhere. It curls into the gullet. If you don’t file deep enough, the gullet becomes shallow, the chip gets “pinched,” and the friction creates heat. This is why you see bars turning blue. When I’m sharpening, I ensure the file is clearing out the gullet to maintain that “scroll” shape that allows chips to eject cleanly.
3. The Depth Gauge (Raker) Physics
This is the “governor” of your chainsaw. The raker is the shark-fin-shaped piece of metal in front of the cutter. It doesn’t cut wood; it determines how much wood the cutter is allowed to take. If your rakers are too high, the cutters just slide over the wood. If they’re too low (the “cowboy” method), the saw will grab, chatter, and potentially snap the crankcase or trip the inertia-activated chain brake.
Standard clearance is .025 inches. For a high-powered saw like the Stihl MS 881, you might drop them to .030 in soft pine, but you’ll pay for it in vibration and wear on the anti-vibration mounts.
Real-World Performance Analysis: Chips vs. Dust
I took a freshly hand-filed Oregon LGX chain out to a stand of dead-standing Hickory’the ultimate test of an edge. Using a pro-grade saw, the difference between a “factory sharp” chain and a “Jack Beurge hand-filed” chain is night and day.
The “Self-Feeding” Phenomenon
When a chain is properly sharpened with the correct side-plate hook, you shouldn’t have to push. On a top-handle saw used for pruning, the saw should practically pull itself through the limb. If you find yourself leaning your weight into the powerhead, stop. You’re dull.
During my testing in frozen white oak, a properly sharpened 3/8” full-chisel chain maintained a chain speed of roughly 60 feet per second without “searching” or wandering in the cut. When the geometry is off’say, the left-hand cutters are sharper than the right-hand ones’the bar will start to curve. This is the hallmark of a bad sharpening job. It creates uneven wear on the bar rails, eventually “pinching” the bar and stalling the motor.
Heat Dissipation and Bar Life
A sharp chain stays cool. A dull chain generates friction. In storm cleanup scenarios, where you’re moving fast and cutting dirty wood, a dull chain can reach temperatures that smoke the bar oil and lose its “temper.” Once the steel loses its temper (the hardness achieved through heat-treating), it will never hold an edge again. You’re better off throwing the chain in the scrap bin at that point.
Ergonomics and Operator Comfort: The Toll of the File
Sharpening isn’t just about the saw; it’s about the operator. I’ve spent countless hours hunched over a stump in the woods, and I can tell you that ergonomics matter.
- Vibration Reduction: A perfectly sharpened chain reduces the “chatter” felt through the handles. This is vital for long-term health, preventing White Finger Syndrome (HAVS).
- Body Mechanics: When hand-filing, I always stand with my feet shoulder-width apart, using my core to drive the file, not just my elbows. This ensures a consistent angle across all 30+ teeth.
- The “Snap” of the Cut: There is a specific tactile feedback’a “snick-snick-snick”— when a sharp chain hits the wood. It feels smooth, almost hydraulic. A dull chain feels like you’re trying to cut through a rubber tire with a spoon.
If you’re using a lighter saw, like the Worx WG384, keeping the chain sharp is even more critical because you don’t have the raw horsepower to overcome a dull edge. You’re relying on the efficiency of the cutter.
Historical Context: From Chipper to Chisel
The evolution of the saw chain is a history of geometry. In the early days, we used “chipper” chain’rounded teeth that were easy to file but slow as molasses. Then came “semi-chisel,” which rounded the corners slightly to stay sharp longer in dirty wood.
Today’s “full-chisel” chains are the Formula 1 of the woods. They feature a square corner that shears wood fibers instantly. However, they are sensitive. One hit to a rock or even a dirty piece of bark, and that square corner is gone. This is why professional arborists often carry three or four pre-sharpened chains for a single day of yard maintenance.
We’ve moved from the old-school “flat-file” methods of the 1940s to precision-engineered grinders with diamond-impregnated wheels. Yet, remarkably, a man with a $5 round file and a steady hand can still outperform a $500 grinder if he understands the “hook.”
Maintenance & Serviceability: The Sharpening Kit
Your sharpening tools need as much care as the saw itself. Here is how I maintain my gear:
- File Cleaning: Use a “file card” (a wire brush) to remove the “load” or steel shavings from your file every few teeth. A clogged file won’t bite; it just slides.
- Bar Maintenance: Every time you sharpen the chain, flip the bar. This ensures even wear on the rails. Use a bar rail dresser to remove the “burrs” that form on the edges of the bar.
- Sprocket Inspection: A sharp chain on a worn-out rim sprocket is a recipe for disaster. If your sprocket has deep grooves, it will “mistime” the drive links and cause the chain to jump.
For those using electric alternatives like the Worx WG322 or Worx WG304, remember that these smaller motors have less “lugging power.” A sharp chain is the only thing keeping those motors from burning out their brushes.
Hardware Specs: The Sharpening Blueprint
When you’re buying files or setting your grinder, you need the hard numbers.
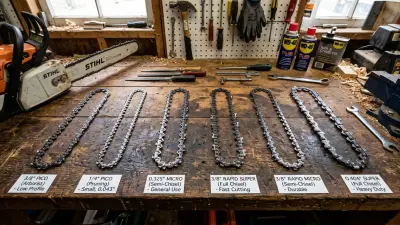
- Chain Pitch: 1/4”, .325”, 3/8” LP, 3/8” Standard, or .404”. Match your file size exactly (e.g., 5/32” for 3/8” LP).
- Top Plate Angle: 30 degrees (standard), 35 degrees (softwood), 25 degrees (frozen hardwood).
- Tilt Angle: 0 degrees (most chains) or 10 degrees (some specialized Husqvarna/Stihl chains).
- Depth Gauge Setting: .025” (standard) or .030” (performance).
- File Length: 8 inches is the industry standard for leverage.
Pros & Cons of Professional Sharpening
Pros
- Efficiency: Drastic reduction in fuel/battery consumption.
- Safety: Reduced kickback risk and less operator fatigue.
- Equipment Longevity: Prevents “heat checking” the bar and saves the engine from over-revving.
- The SAWOFF Edge: Nothing beats the satisfaction of seeing 2-inch long “noodles” flying off a Stihl MS 881 in a bucking cut.
Cons
- Learning Curve: Hand-filing is an art form that takes months to master.
- Metal Removal: Over-sharpening or aggressive grinding can shorten the life of the chain.
- Tool Cost: Professional bench grinders are a significant investment for a casual user.
Final Verdict: The SAWOFF Rating
Keeping a chainsaw sharp is the single most important skill any saw owner can possess. It separates the “weekend warriors” from the true woodsmen. If you aren’t sharpening your chain every time you refuel, you’re doing it wrong. I’ve seen $2,000 saws out-cut by $300 Toro 60V Max units simply because the Toro had a razor-sharp, properly-tensioned chain and the Stihl was running a “rocked-out” chain.
SAWOFF Rating: 5.0 / 5 (Essential Skill)
A sharp saw is a safe saw. Period.
FAQ: Technical Troubleshooting
1. Why is my saw cutting in a circle?
This is almost always caused by uneven sharpening. If you’re right-handed, you likely put more “muscle” into your right-side cutters than your left-side ones. This makes one side of the chain bite deeper, pulling the bar in that direction. Use a file guide to ensure every tooth is the same length and angle.
2. Can I use a dremel to sharpen my chain?
Yes, but be careful. High-speed stones can quickly overheat the metal, “blueing” the tooth and ruining the temper. If you use a rotary tool, use light, pulsing touches and high-quality carbide bits rather than cheap stones.
3. How often should I lower my rakers?
Typically, every 3rd or 4th sharpening. Use a dedicated raker gauge. Never “eyeball” it. If you take them too low, you’ll ruin the chain and potentially damage your saw’s internal components.
4. What is the “hook” and why does it matter?
The hook is the slight inward curve of the side plate. If you hold the file too high, you get a “back-slope” (no hook), and the saw won’t bite. If you hold it too low, you get “too much hook,” which makes the saw aggressive but the edge will dull almost instantly.
5. My chain is sharp but it’s smoking. Why?
Check your oiler. If the saw is pumping oil, then your depth gauges (rakers) are likely too high. The teeth are “spinning” but not “biting,” creating massive friction heat without removing any wood.
6. Should I sharpen my chain while it’s on the bar?
Yes, for field touch-ups. Just make sure the chain is tensioned slightly tighter than usual so it doesn’t “wobble” while you’re filing. For a deep restoration, I prefer taking the chain off and using a bench vice or a grinder.
7. Is square-grinding better than round-filing?
Square-grinding (producing a “chisel” edge with a flat file) is the gold standard for racing and clean timber. It’s about 15-20% faster than round filing. However, it is incredibly difficult to do by hand and requires a specialized $1,000+ grinder to do mechanically. Stick to round filing for 99% of applications.
8. What’s the best file brand?
I’ve used them all. Pferd and Vallorbe are the industry leaders. They stay sharp longer and have a more consistent “bite” than the cheap files you find at big-box hardware stores.
🛒 Get the Pferd 2-in-1 Sharpener